
Table of Contents
- Determining the Right Mini Split Capacity for Your 24×24 Garage in Eagle Rock
- Before You Begin
- Step 1: Measure Your Garage Dimensions and Volume
- Step 2: Evaluate Insulation and Construction Type
- Step 3: Assess Ceiling Height and Usage Patterns
- Step 4: Identify Additional Heat Sources Inside the Garage
Determining the Right Mini Split Capacity for Your 24×24 Garage in Eagle Rock
How big of a mini split do I need for a 24×24 garage in Eagle Rock? The right capacity isn’t a single number — it depends on insulation levels, how you use the garage, and Eagle Rock’s climate. A professional load calculation is the only reliable way to determine the exact BTU rating. Getting the size right matters: an undersized unit will struggle to keep the space comfortable, while an oversized system short cycles, wastes energy, and leaves humidity unchecked.
In Eagle Rock, winters are mild and summers bring steady warmth, so the cooling load often dictates the design. When designing a home there, accurate sizing is especially important to avoid moisture issues. Before we calculate the exact capacity, there are a few important factors to review.
Key Takeaways
- The correct sizing of a mini-split for a 24×24 garage begins with a proper load calculation.
- With a tape measure in hand, let’s measure the dimensions of your garage.
- Next, analyze how well your garage holds or loses heat after measuring your floor area.
- The actual ceiling height at the highest point in a garage with a sloped or vaulted ceiling should be measured.
- We find that many garages house heat-generating appliances and equipment that are easy to overlook but have a real impact on mini-split sizing.
Before You Begin
The correct sizing of a mini-split for a 24×24 garage begins with a proper load calculation. Skipping this step often results in a system that is bigger than needed. An oversized system will short-cycle. Short-cycling means that the system will turn on and off way too often and not run long enough to totally remove humidity from the air. This results in a garage that is too cool and clammy with a higher energy consumption. Learning and understanding the Manual J calculation will allow you to prevent this.
Before any calculation can begin, you will need to gather specific information about the garage:
- The local climate design temperatures for heating and cooling
- The R-value of insulation in the walls and ceiling
- The type, size, and orientation of any windows and doors
- The construction materials and overall airtightness of the space
Performing a Manual J calculation, yourself, is certainly doable. However, this requires a lot of detailed work and can be difficult if you’re not experienced. An error with the inputs will result in the wrong sized system. For peace of mind, the team at Eagle Rock Prestige HVAC can do a load calculation for you. With that done you are ready to measure the first thing, the dimensions of the garage. After that you are ready to calculate the total volume of the garage.
Step 1: Measure Your Garage Dimensions and Volume
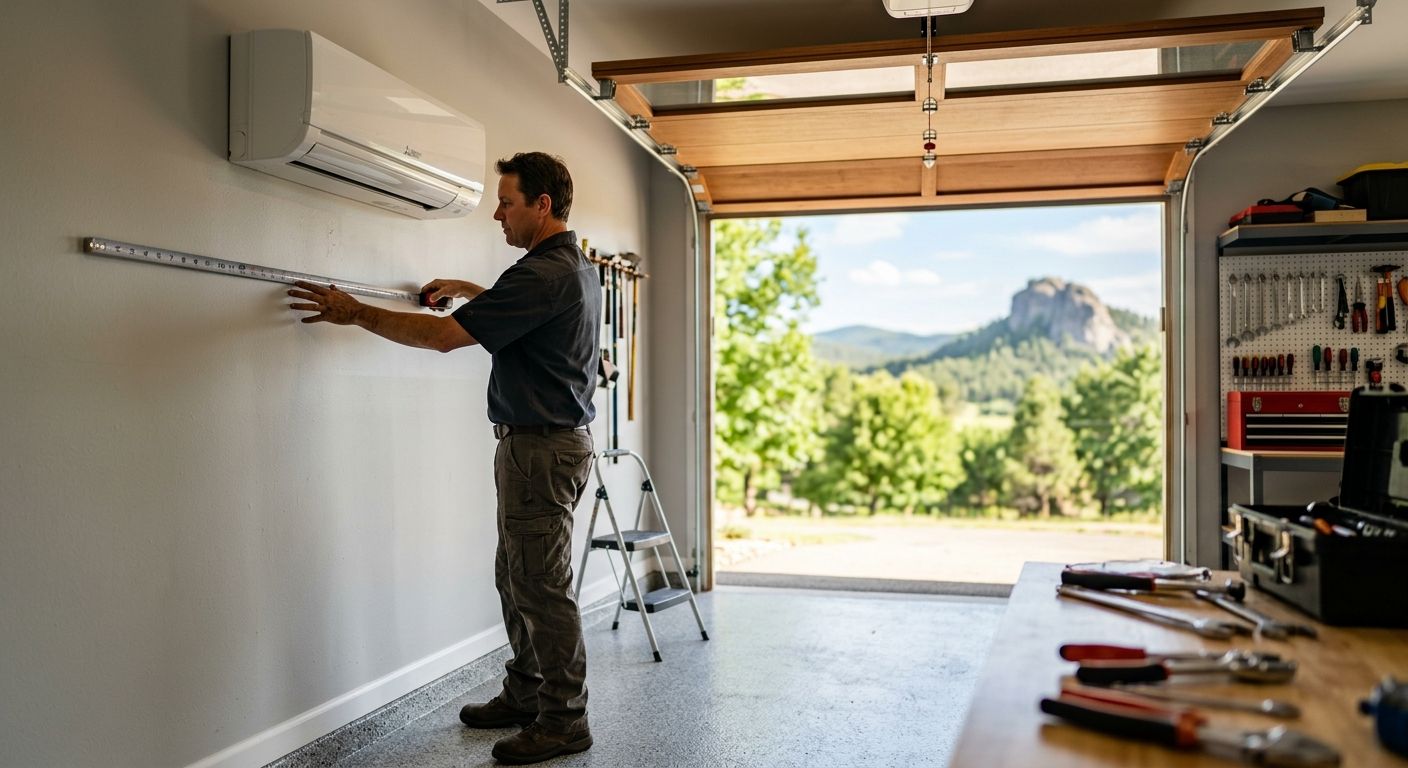
With a tape measure in hand, let’s measure the dimensions of your garage. Using a steel tape measure, take a measurement along the longest side of the garage from wall to wall. Note that measurement in feet and inches. Take the same measurement for the shorter side of the garage.
Next, measure the span of the garage from the floor to the ceiling. If the ceiling is not even, take a couple measurements and find the average. Multiply the floor area (length x width) by the average vertical measurement to find the total cubic measurement. This measurement is more important when considering mini-split sizing as the height of the garage plays a role in how large the mini-split needs to be.
For any storage areas or alcoves, measure those as well and add the cubic feet to the total for the garage. Once those measurements are taken, calculate the volume. Use that volume along with your garage’s insulation and build type to find the right mini split capacity.
Step 2: Evaluate Insulation and Construction Type
Next, analyze how well your garage holds or loses heat after measuring your floor area. Insulation and construction type greatly impact the heating and cooling load. Generally speaking, an equally sized (volume wise) well-insulated garage would require a smaller mini-split than a poorly insulated garage.
- Check insulation: Look in the walls and ceiling for insulation like fiberglass batts or spray foam.
- Note wall materials: Identify whether the walls are wood frame with drywall, concrete block, or brick.
- Count windows and doors: Note any windows or exterior doors, approximate size, and whether they are single- or double-glazed.
- Determine attachment: Note if the garage is attached to the house or freestanding, and whether a conditioned room is above or adjacent.
Finally, log your observations for your final BTU calculation. After inspection of insulation and construction, the next factor is ceiling height and normal use of the garage, which will be discussed in Step 3.
Step 3: Assess Ceiling Height and Usage Patterns
The actual ceiling height at the highest point in a garage with a sloped or vaulted ceiling should be measured. Note the presence of beams and ducts that impact clearance and/or alter airflow. A larger capacity unit is required to provide comfort in a vaulted vs. a flat ceiling space of the same floor area.
A garage workshop with a frequent opening door, long equipment and user operation times, and heat generating equipment requires a larger mini-split with quicker recovery. A smaller unit can be used in a garage mostly used for parking and storage. Your construction and insulation type and the garage usage limit the preliminary load estimate and help with the final selection of mini-split capacity.
Accounting for garage usage and ceiling height, determine what other interior heat sources are present and how they may affect the sizing.
Step 4: Identify Additional Heat Sources Inside the Garage
We find that many garages house heat-generating appliances and equipment that are easy to overlook but have a real impact on mini-split sizing. To choose the right capacity for your garage, you’ll want to list every internal source of heat.
Common items in a garage that raise the cooling load include a water heater, clothes dryer, refrigerator or freezer, and workshop tools that release warmth during use. A vehicle that has just been driven radiates engine heat for hours, noticeably elevating the garage temperature. We also suggest noting equipment that cycles on automatically, like a dehumidifier or air compressor, because even intermittent operation adds to the load.
Each heat source pushes the required capacity higher, so thoroughness at this stage helps you avoid an undersized system that struggles on hot days. Once you’ve captured all of them, you’re ready to apply the standard BTU guidelines and calculate the correct mini-split size.
Step 5: Calculate BTU Requirements Using Standard Guidelines
We use the Manual J procedure and begin with the equation Q = U A ΔT. U is thermal transmittance. A is area, and ΔT is the difference in indoor and outdoor temperatures.
- Oversizing causes short cycling and humidity problems.
- Gather insulation R-values, window U-factor and SHGC, local 99% winter / 1% summer design temperatures, internal gains (lighting and plug loads at ~3 W/ft², plus about 230 Btu/h sensible per person), and major appliances.
- For infiltration and ventilation, use the sensible constant 1.08 and the latent constant 0.68 applied to volume and air changes per hour.
- Duct losses in unconditioned spaces can waste 15–30% of system capacity.

The equation Q = U × A × ΔT demonstrates the concept of heat loss and gain through walls, ceilings, and windows and is the heart of Manual J heat loss and gain calculations. It is comprised of U-factor (conductance) of a surface, A (area), and ΔT (indoor-to-outdoor temperature).
Now we apply the formula to your garage. We multiply each surface’s U-factor (1/R-value) by its area and the design ΔT, then add them for the conduction load. We also add internal gains (230 Btu/h/person, 3 W/ft² for lighting) and infiltration using the constant 1.08.
Oversizing a mini-split leads to short-cycling and poor dehumidification. According to HVAC Laboratory, an oversized unit cuts off before removing enough moisture, leaving the garage damp and wasting energy. Avoiding oversizing through an accurate load calculation preserves comfort and efficiency.
Once the loads have been estimated, the effect of Eagle Rock’s climate must also be incorporated, as well as duct losses, which can result in a 15-30% capacity waste.
Step 7: Consider Climate and Exposure Factors
The climate and exposure factors in Eagle Rock help answer the common question: "How big of a mini split do I need for a 24×24 garage?" In this sunny Southern California region, a garage’s sun exposure, shade, and insulation quality directly affect the cooling and heating load.
A garage in full sun all day needs more capacity; one shaded by trees or attached to the house (sharing a conditioned wall) needs less. You’ll also factor in insulation: a well-sealed, insulated space retains conditioned air better, which can let you use a smaller unit.
After evaluating these conditions, we recommend adjusting your preliminary load. Increase it by 10–15% for full sun and poor insulation; keep it as-is for shaded, attached, well-insulated spaces. Use this climate-adjusted number to decide whether to round up or down—for example, rounding 1.8 tons to 2 tons—to select a mini split that handles Eagle Rock’s hot summers and mild winters efficiently.
Troubleshooting Common Mini Split Sizing Problems
When a mini split is too large for the room, it creates a sticky, uncomfortable environment because it cools and cycles too quickly. This is because, with an oversized mini split, the system cools the room and satisfies the thermostat in just a few short minutes. When the unit satisfies the thermostat, it turns off and leaves the room with a clammy, sticky environment because it does not remove the moisture from the air. A properly sized system takes longer to remove the moisture from the air. When a system is properly sized, it runs long enough to remove the moisture from the air, lower the room temperature, and satisfy the thermostat.
What feels like high humidity is usually the signature of an inaccurate or missing load calculation. HVAC Laboratory’s guidance on Manual J principles explains that the calculation accounts for the home’s thermal envelope, window area, and local design temperatures so the selected unit matches the actual heat gain. Skipping that step—or relying on a rough square-footage rule—leads to the short-cycling. Short-cycling shows up as a unit that repeatedly turns on and off without ever achieving dry comfort.
We see these issues most prevalent in homes in the Eagle Rock area where mini splits were retrofitted to various rooms without performing room by room load calculations; the same short-cycling behavior places unnecessary wear on the compressor and fans while pushing energy use higher than a correctly sized system would require. Homeowners in Eagle Rock can rely on us to educate them about sizing issues and arrange for a professional load calculation to give peace of mind for the next HVAC system installation.
FAQ answers
Why is a professional load calculation more accurate than using square footage for garage HVAC sizing?
A professional load calculation uses specific insulation R-values, construction type, window performance, ceiling height, internal heat gains, and local climate design temperatures, while square footage ignores all these variables. That leads to oversizing, short-cycling, and poor humidity control, or undersizing that fails to maintain comfort.
What are the signs that a mini split might be undersized for my specific garage setup?
An undersized mini split will struggle to keep the garage comfortable, failing to reach or maintain the set temperature during hot or cold weather. The unit runs continuously without adequately cooling or heating the space.
How do Ceiling Height and Insulation Levels Affect the Mini Split Size for my 24×24 Garage?
Higher ceilings increase the total air volume, requiring a larger capacity mini split; vaulted or sloped ceilings demand more capacity than flat ones of the same floor area. Better insulation levels reduce heat transfer, allowing a smaller unit, while poor insulation forces a larger unit to compensate for greater heat loss or gain.
Next Steps for Your Mini Split Installation in Eagle Rock
It is critical to understand precisely what size mini split you need for your 24×24 garage and to confirm those figures with a professional Manual J load calculation to avoid oversizing and the short-cycling and poor dehumidification that can follow.
Our licensed technicians perform comprehensive on-site evaluations in Eagle Rock to verify that each installation matches your home or garage’s actual heating and cooling demands. Call us at (818) 732-8552.
Book installation with our licensed team Monday through Friday 8:00 AM–7:00 PM, Saturday 9:00 AM–4:00 PM, and Sunday 10:00 AM–3:00 PM. Our location at 2525 Colorado Blvd, space1 Eagle Rock, CA 90041 serves Eagle Rock and surrounding areas.
This website uses cookies to provide functionality and to analyze site activity. Embedded content may provide data to their site and track your interactions; see our privacy policy for details on your data and privacy rights. Trademarks of third parties are of those third parties; no endorsement is implied.
Schedule Your Mini Split Consultation
Now that you’ve measured your 24×24 garage, assessed insulation levels, and considered usage patterns and internal heat sources, you have a strong understanding of the sizing factors. However, to prevent problems like short-cycling and poor dehumidification caused by oversizing, a professional Manual J load calculation is the safest next step. Eagle Rock Prestige HVAC provides expert sizing assessments and complete mini split installation services for homeowners in Eagle Rock, California. You can call us at (818) 732-8552 or use our online contact form to schedule an on-site evaluation. Our licensed technicians are available Monday through Friday 8 AM–7 PM, Saturday 9 AM–4 PM, and Sunday 10 AM–3 PM. Getting the right capacity from the start ensures your garage stays comfortable and efficient year-round. Use our contact form to book your consultation and move forward with confidence.
Schedule Your Mini Split Consultation